One factor that makes DECRA metal roofing so weather resistant is its installation process. We want contractors, especially those new to DECRA products, to feel confident about the installation methods for each type of roofing. So, we created this video guide to walk you through each step in detail.
This blog covers different installation techniques for each product, plus common questions we receive from contractors:
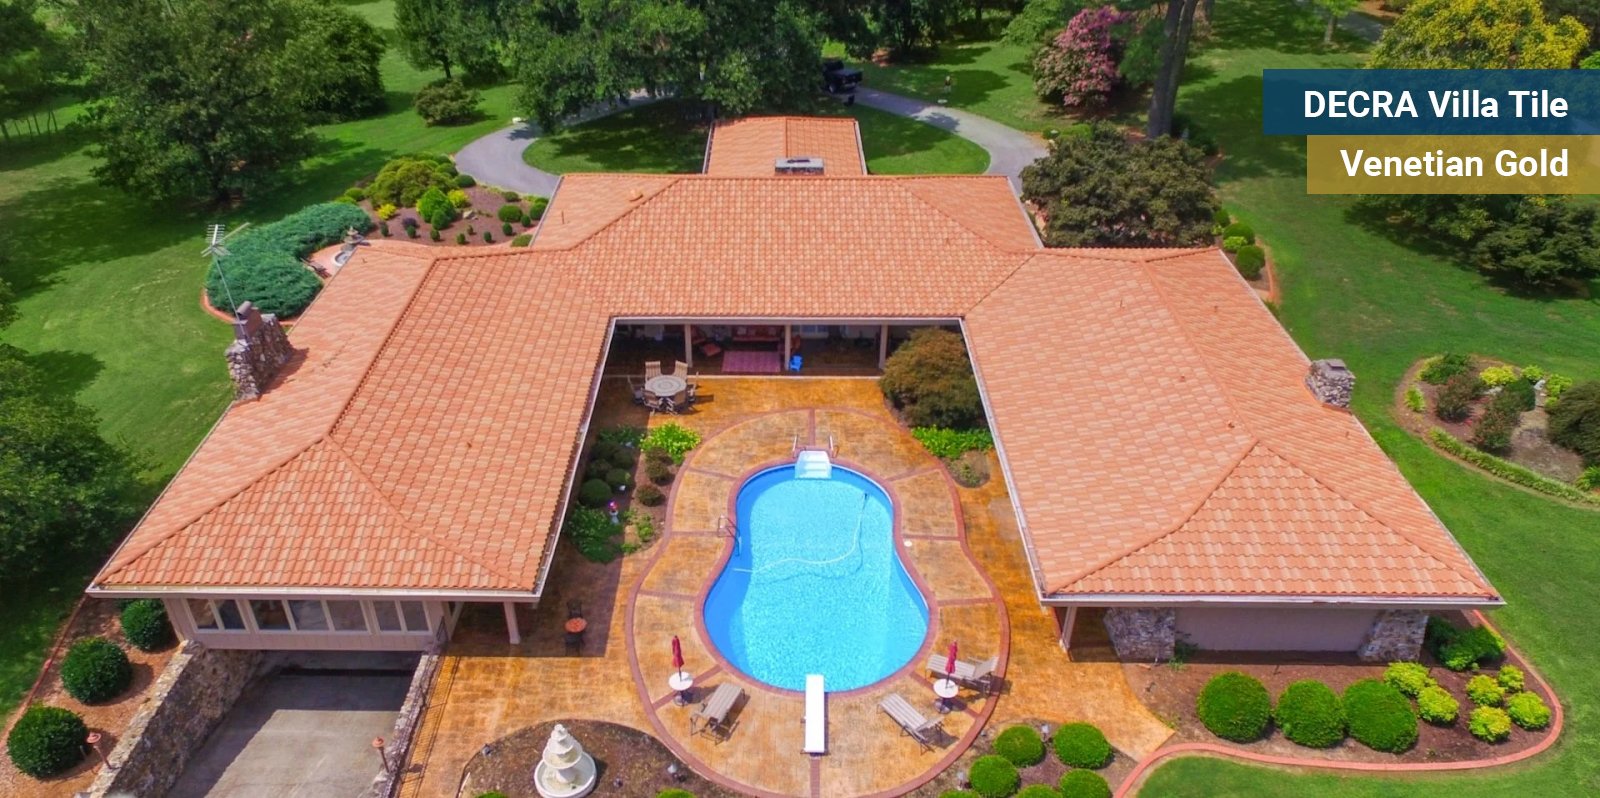
- DECRA Villa Tile installation, ideal for Mediterranean and Spanish-style homes with an Old World aesthetic
- DECRA Shingle XD and DECRA Shake XD, which replicate the look of traditional roofing with advanced durability and strength
- DECRA Tile and DECRA Shake installation using battens for added structural support
- Frequently asked questions, including tips for installing around vents and skylights, and guidance on estimating pricing for roofing jobs
Need more information after reading this blog and watching the videos? Check out our resources for professionals or get in touch with our team of experts any time.
DECRA Villa Tile: A Classic for Mediterranean Homes
This DECRA roofing profile copies the look of traditional barrel-shaped clay tiles found on centuries-old homes in Europe. These tiles are often used on Spanish-style and Mediterranean homes in North America too.
When your clients choose DECRA Villa Tile, they get the best of that Old World appeal with the superior longevity and weather resistance of stone-coated metal roofing.
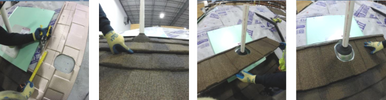
As you’ll see in the video below, DECRA Villa Tile is installed directly onto the roof deck, without the use of battens.
Here’s how to install DECRA Villa Tile:
DECRA Shingle XD and DECRA Shake XD: Durability + Curb Appeal
For homeowners who like the look of old-fashioned shingles or shakes but want more durability, DECRA Shingle XD and DECRA Shake XD are excellent choices.
Both types of DECRA roofing are installed using a direct-to-deck method.
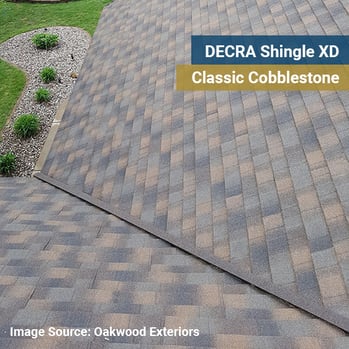
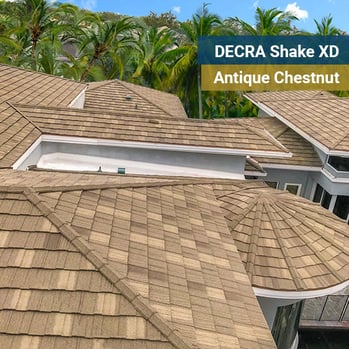
Here’s how to install DECRA Shingle XD and DECRA Shake XD:
DECRA Tile and DECRA Shake: Another Choice for a Traditional Look
These are two additional DECRA roofing profiles that give property owners the authenticity and curb appeal of traditional roofing but with impact resistance, protection from wind uplift, and the highest UL fire rating possible.

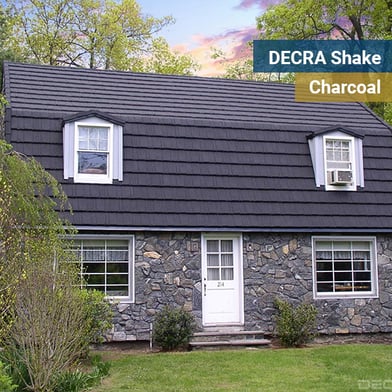
Here’s how to install DECRA Tile and DECRA Shake:
FAQs About Installing DECRA Metal Roofing
Have questions about installing DECRA Metal Roofing? Here are the most frequently asked questions we receive from roofing professionals when it comes to installing DECRA.
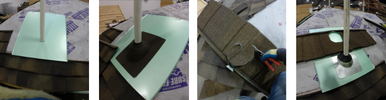
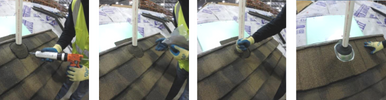
What’s the best way to install DECRA around pipe flashing or box vent?
These finishes and roof penetrations add time and materials to any roofing job. And installation around these roofing parts must be done properly to prevent water intrusion from threats like wind-driven rain. Follow these tips to get the best results:
- Start by installing full courses of panels below the pipe penetration. Measure and cut a hole in the center of the underpan to fit over the pipe penetration and lock onto the course of the shingles below. This provides the ideal flat, smooth surface to mount the pipe flashing.
- Seal underneath the two sides and the top, and fasten in the upper corners.
- Measure up from the bottom of the underpan to the front and top of the “neck”on the pipe flashing.
- Next, measure over from the panel on the left to the left and right sides of the pipe flashing. Make sure to account for the proper overlap.
- Transfer the measurements to a panel and cut out a hole that will fit around the “neck” of the pipe flashing.
- Make a 2” relief notch in the bottom clip lock at the center of the pipe position. Only remove the backside and leave the stone-coated face intact.
- Slide the prepped panel over the pipe and engage to the panels below and to the left.
- Seal the opening between the cut panel and the pipe flashing.
- Use stones from the touch-up kit to cover the sealant for a finished look.
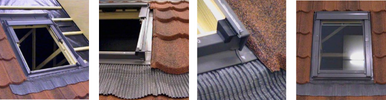
How do I install around skylights?
Skylights are another element where care must be taken to prevent gaps where water can leak into the decking or the home’s interior. Follow this method for the best fit with DECRA stone-coated metal roofing:
- Install DECRA panels up to the front of the skylight.
- Install the front apron/sill from the skylight flashing kit (form shape to match the panel profile).
- Install side channels (or Universal Channel) along the sides of the skylight.
- Weave panels back on top of the front apron and side channels, up to the top side of the skylight.
- Install the back saddle from the skylight flashing kit.
- Fill in the upper corners and backside with panels (use full panel across the saddle for more rigidity).
How much can I charge in labor and materials for a DECRA metal roof?
Pricing jobs correctly is vital for both customer satisfaction and profitability. We suggest starting your estimate with a standard baseline of 2 to 2.5 times the material costs for the total roof area.
However, you also need to adjust your bid to account for these factors, which can raise or lower the price:
- Roof complexity - Complex roofs require more time, fasteners, and flashing material.
- Location logistics - What will it cost to get your team and materials to the job site?
- Existing roof condition - Are you doing a tear-off or a roof-over with the remodel?
- Direct-to-deck vs. batten installation - Some methods take less time, e.g., battens on a roof-over can simplify the job.
- Season of the year - Cold, wind, and precipitation can slow projects down, even though DECRA can be installed during winter.
- Unique issues - Each job has its own concerns and complications, such as disposal or working around landscaping.
>>>Related Resource: View all DECRA estimating sheets in the Knowledge Base.
How do I calculate materials and determine a waste factor?
Putting together a materials list for a DECRA metal roofing project is actually fast and easy. Begin by gathering the measurements below:
- Actual square footage of the roof (see waste factor calculations below).
- Total lineal feet of
- Eave.
- Rake/gable.
- Sidewall (including chimneys, formers and skylights).
- Headwall (including chimneys, formers and skylights).
- Valley.
- Hip.
- Ridge.
- Pitch change (if any).
- Total number of end discs needed for hip and ridge caps (note that the bottoms of hips, rakes and the ends of ridges are not necessary with all DECRA profiles).
- Total number of pipe flashings and/or roof penetrations.
- For ventilation options (ridge vent or panel vents), use our ventilation calculator.
Once you have the measurements, you can use either the DECRA estimating sheets or Eagleview to compile your list. DECRA estimating sheets can be found on the DECRA Knowledge Base here.
You can also get accurate material lists for all DECRA profiles at DECRA | EagleView US. 3D roof measurement reports are available to contractors at preferred prices.
To calculate the waste factor, please use the formulas below.
For DECRA Villa Tile, DECRA Tile, DECRA Shingle XD, DECRA Shake XD and DECRA Shake:
Total LF (linear footage) of all rake/gable, ridge, headwall and sidewall x .5 sq ft
Total LF ‘difference’ in hips and valleys x 2 sq. ft.
Example:
(80’ rake/gable + 50’ ridge + 30’ headwall + 40’ sidewall) x .5 sq. ft, = 100 sq. ft,
(60’ hip – 15’ valley) x 2 sq. ft. = 90 sq. ft.
Total Waste = 190 sq. ft./100 = 1.90 squares
Can I install roof jacks on the roof?
Yes, you can. We understand that, while DECRA is typically more walkable than other types of roofing, you may need to use roof jacks for safety and efficiency. Use these steps outlined below, depending on which type of DECRA metal roofing product you’re using.
For DECRA Shingle XD and DECRA Shake XD:
- Snip away approximately 4” of top clip lock where the roof bracket is to be installed.
- Install the roof bracket and fasten it securely above the panel.
- Install slip sheet under roof bracket to prevent rubbing panel surface. You may wish to coat roof brackets to provide a protective layer (truck bed liner spray, for example).
- Install additional roof brackets and planks/toe boards.
- Continue installing panels as normal. When finished, tap and remove the roof brackets.
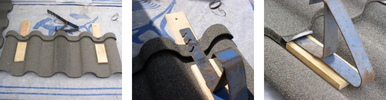
For DECRA Villa Tile:
- Install 1x4 blocks on and above the panel where your roof bracket is to be installed.
- Install the roof bracket on top of the blocking and fasten it securely above the panel.
- Install a panel over the roof bracket. Snip and fold the nose of the panel up to allow the roof bracket to protrude.
When the roof bracket is removed, simply seal the mounting area, fold the nose back down, and install a stitch screw to hold it securely in place, if needed.
How many squares can be laid in a day during a DECRA installation?
The answer really depends on the complexity of the roof and other factors listed above.
If the roof has a straight, walkable run with minimal roof penetrations—especially on a single-story house—you may be able to install up to 20 roofing squares per day.
However steep roofs and those with more penetrations or structures like these can take longer:
- Skylights
- Valleys
- Sidewalls
- Cupolas
- Gables
- Dormers
- Chimneys
Even experienced roofing contractors may only be able to install about three or four squares per day with these factors. This especially true if the home is two or more stories tall.
One way you can increase your efficiency on any job is to use the best tools for cutting and bending stone-coated metal roofing. You’ll have less waste and more precision, while saving time and ensuring safety for your team on the job site.
Grow Your Business with Help from Our Contractor Network
Are you a member of the DECRA Contractor Network yet? If not, now is the perfect time to join. As a member, you’ll stay up to date on the latest DECRA products, installation resources, and industry news, and you’ll gain access to exclusive specials and discounts.
Even better, your business will be listed as a qualified DECRA contractor. When property owners search for a roofer in their area, your company will appear front and center. That increased visibility can help you expand your customer base, and more customers means more opportunities for growth and long-term profitability.
Editor's Note: This blog was originally published in January 2024, but has been updated with relevant information.